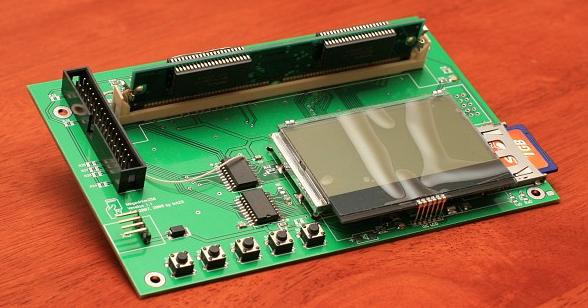
Amiga Floppy Emulator, mark II
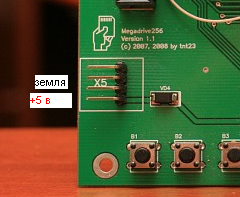 | The emulator requires +5V for operation. Pay attention! |
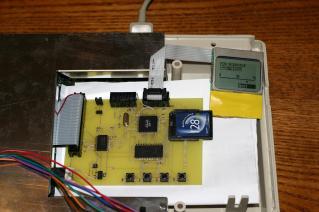
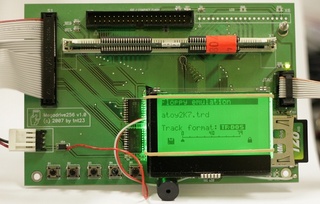 | Emulator serving a TR-DOS floppy image |
 | |
 |
So PREV and NEXT buttons are to list menu items (screens), and SELECT and EXIT buttons are to enter and exit, accordingly. The following screens are useful:
| 1. "File Browser". This will be perhaps the most frequently used one. Browse through files/folders on your media with PREVIOUS and NEXT buttons, then select folder to open or disk image to be loaded with SELECT button. | 
|
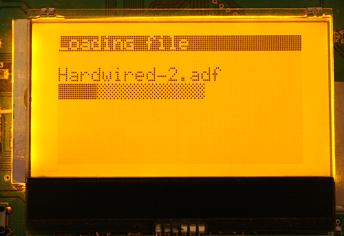
| Typically, it takes the emulator 15-20 seconds to load a floppy image into RAM. Compressed floppy image formats, like Atari ST's .MSA, will take even more time due to additional processing work involved. When loading is done, the emulator automatically switches to the "Floppy" screen. |
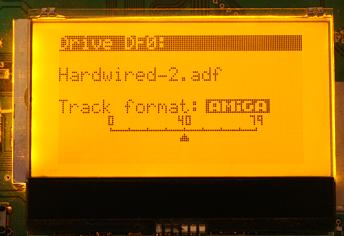
| 2. "Floppy". This is the place where the emulator actually does its job. When browsing through other menues, the emulator will ignore the host completely, so it will look like there is no disk in drive. Entering this screen looks like inserting disk into virtual drive. From now on, the emulator starts responding to direction and step commands, streaming MFM data to/from the host etc. Exiting the screen with EXIT button will also 'eject' the virtual disk. |
| While in the floppy screen, there's a special 'Floppy Options' menu on SELECT button. It is currently used to save (or, rather, export) changes made to floppy image in RAM to flash media. The only format supported is custom .MFM format which is merely raw MFM bits. The size of the file will always be 2048K, and the name will either match the original loaded file name, or, if the image has been newly created (by entering the 'Floppy' screen directly without loading any floppy image) the name will be 'EMPTY.MFM'. In the latter case, the file will be saved in the root directory of flash card. | 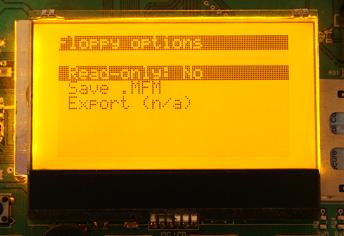
|

| 3. "Settings". Only two items here are meaningful currently, 'Host:' - set it to AMIGA for Amiga, choose PC for other host types; and 'Step click': which is self explanatory. Use PREV and NEXT buttons to select item, and SELECT button to cycle through the list of its values. EXIT button will exit the screen saving changes, if any. |
The rest of the screens are either for testing purposes, or just rudimentary ones I will clean out some day :)
Info and links:
© 2006, 2007, 2008 tnt23